Tracing Tool In Affinity Designer

Adobe Illustrator appears to be the standard in almost any creative industry.I have not used it. If you work for a company that is footing the monthly bill for Ai, high five, that is awesome. But for me, that is going to cost another 25-50 dollars a month. And while that doesn't sound like a terribly large amount of money, I don't need another monthly expense.
An alternative (especially for those of us who don't have a need for every Ai feature) is Affinity Designer. This tool is available for $50 in the Apple App Store. One time charge. Bam! There aren't as many resources or tutorials out there for the tool like there are for Ai, but there is a workbook you can purchase (for another $50). I have the workbook, but I have yet to open it, so I don't consider it a necessity for every task. Also, many of the features in Ai are also in Affinity Designer, so you can refer to Ai tutorials for guidance.
Ok! So you have a sweet little watercolor image that you want to vectorize and manipulate in imaging software?? But you don't have Adobe Illustrator? No problem!
Here are the tools you will need to do this:
- Watercolor image (or any other type of image you wish to digitize)
- Digital camera, smartphone camera, or scanner
- Affinity Designer
- InkScape
- XQuartz (if working on a Mac… InkScape download will instruct you to download this first)
- Mac computer (you can do all of this on a PC as well, but this tutorial is for a Mac).
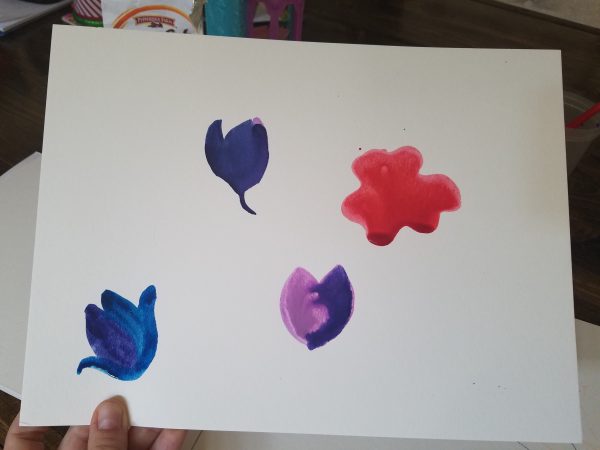
To get started, take a photo or scan of the image(s) you want to work with. You can see that I doodled 4 watercolor images on some watercolor paper, held it up so the lighting wasn't wonky, and snapped a photo with my smartphone. If this was a more complicated image, or you have terrible lighting, scanning the image would work best.
I just emailed this to myself in order to import on my computer (I don't have an iPhone, but all my other devices are Apple products. Chaos!).
The goal now is to get the image(s) you want out of the full image so that it is easer to work with in InkScape. If you scanned your image in, you may have been able to cut out the figure at that time. In that case, just skip this step.
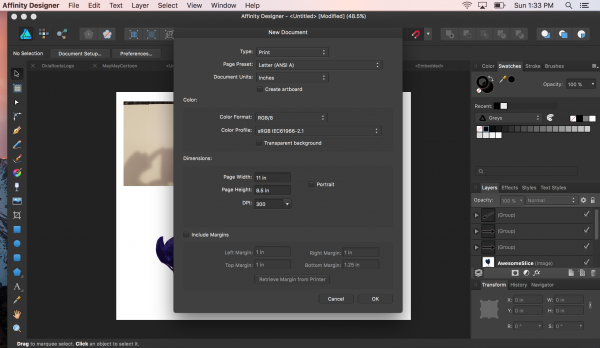
In Affinity Designer, Select File -> New. I have my new file setting set as you see below:
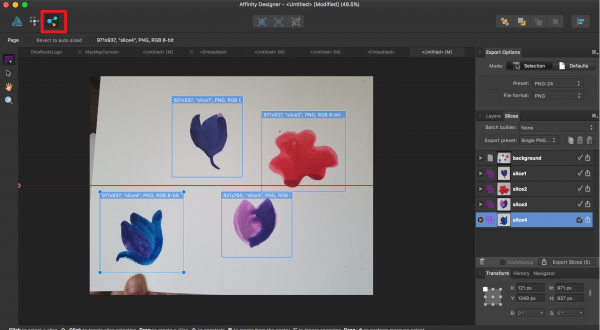
Click on the Export Persona icon (boxed in red in the image below). Here you can choose the Slice Tool to select the images you want to work with. You can see that I sliced 4 images separately (do not worry about overlap). Once you have them as you like, make sure your slice(s) are checked in the Slice viewer and select Export. This will allow you to save these images to a chosen folder.
Nice! Now we have our image(s) ready to go!

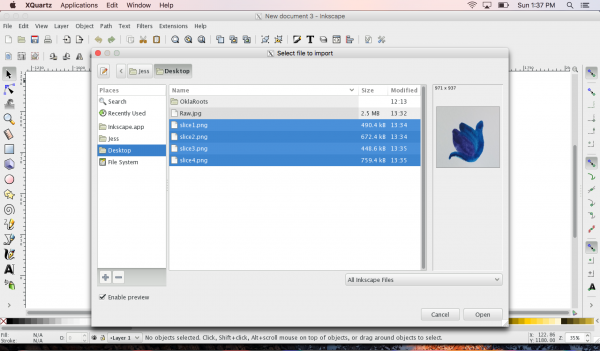
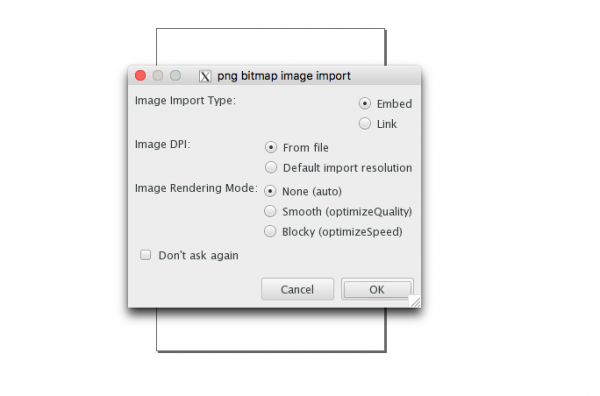
Open a new document in InkScape. Select File -> Import from the main menu. Find the sliced file(s), and open them. You can keep multiple images on your board, but you will only be manipulating them one at a time.
Select your images:
I keep the new file settings at their default:
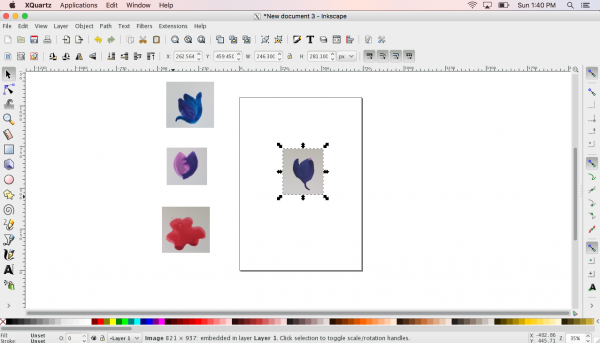
You can now see all of your images ready for manipulation. It is best to work on one image at a time.
Move the image you will be focusing on to the art-board. Select the image, and then select Path -> Trace Bitmap. This is where the magic happens.
Since we are dealing with watercolor images, I am going to assume there is more than one shade of color in your image. You can play around with the Trace Bitmap settings, but to pull all the contrast out of your element you are going to need to select the following settings:
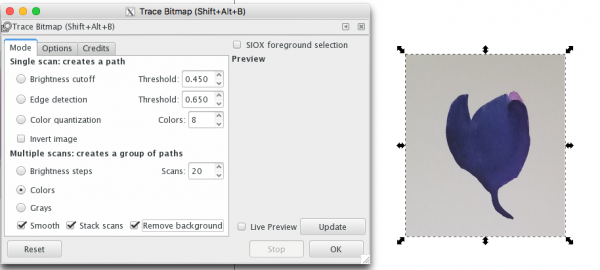
Under Multiple scans, select Colors. Check Smooth, Stack scans, and Remove Background. I like to keep the number of scans at 20. For simple images, I never end up with this many layers. But even for more complex works, it keeps the contrast relatively accurate. Select OK.
You now have a vectorized water color image! Let's play around with it!
Save your InkScape file.
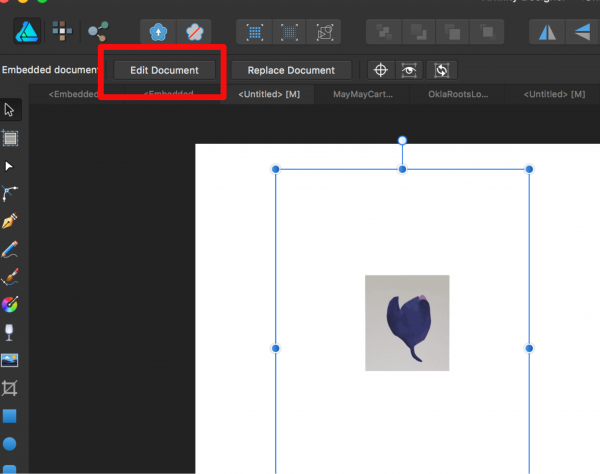
Open Affinity Designer, create a new document, and drag your InkScape file on to the design board. Once your image is on your board, select Edit Document.
To remove the background of the image, I found it easiest to use the Layers window. I just unselect all items with the background color
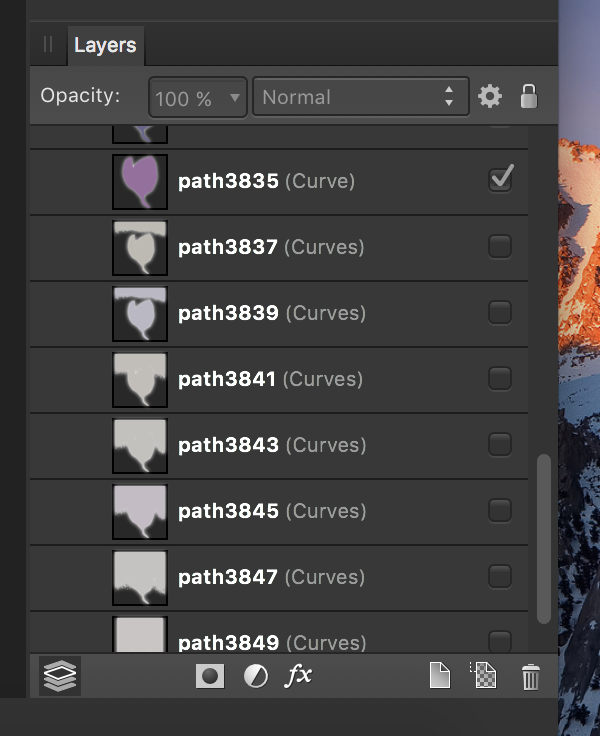
This leaves me with a nice, clean image to work with:
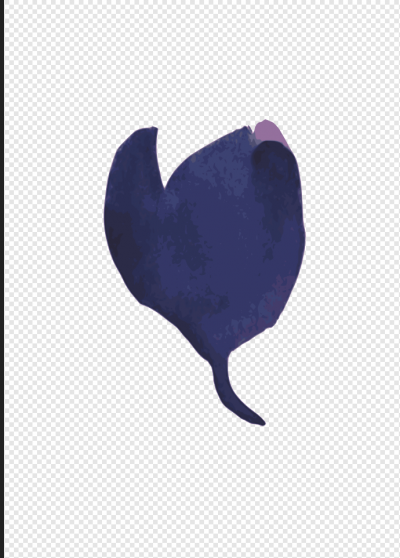
Now you can really play around with your image. You can adjust the size, change the colors of each layer, remove layers, etc.
In the image below you can see that I changed the color of each layer, and then separated them.
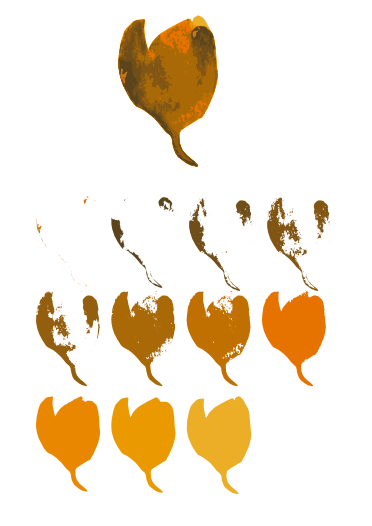
You can see that, using this technique, you can create simple paintings by hand, and then manipulate them as vectors to create more complicated images.
Tracing Tool In Affinity Designer
Source: https://oklaroots.com/how-to-vectorize-a-watercolor-image-using-affinity-designer-mac/
Posted by: gloverweld1948.blogspot.com

0 Response to "Tracing Tool In Affinity Designer"
Post a Comment